
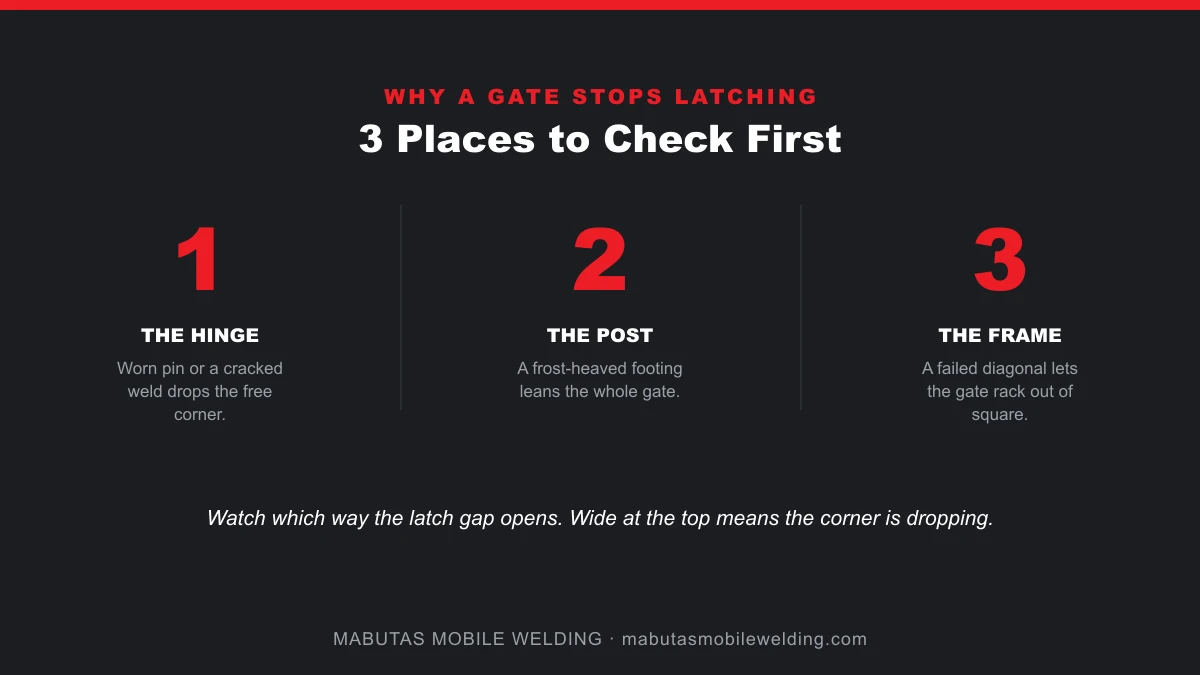
A sagging metal gate that won't latch is almost never the gate panel itself. It's the hinge, the post, or the frame. By the time the latch stops catching, the free corner of the gate has dropped, and one of three things caused it. Here is the short version:
Here is the thing almost every "how to fix a sagging gate" answer online gets wrong: they treat the gate panel like the problem. But a welded steel or iron gate is a rigid frame. It does not go soft in the middle. When the latch stops catching, the free corner has dropped, and that drop is coming from one of three places: a worn or cracked hinge, a post that has leaned, or a frame that has racked out of square. Fix the wrong one and the gate is dragging again by next season. This is how a welder actually reads a sagging metal gate, and what the correct repair is for each cause.
Before you call anyone, you can locate the failure yourself in a couple of minutes. Work through these in order. Each answer sends you to the next step.
Two more quick checks while you are out there: grab the gate at the free corner and lift. Play or clunk that disappears when you lift points at a worn hinge pin or an elongated hinge hole. And look hard at the weld where each hinge meets the frame and the post for a hairline crack or a rust seam. Those two spots settle most diagnoses.
Nearly every won't-latch gate traces back to one of these four. Here is what each one looks like so you can match yours.
Most real-world gates that have been ignored for a while have two of these at once, because a leaning post and a tired hinge often share the same winter. The next section is why.
If you are in DuPage County and your hinge post has walked out of plumb, the ground did it, not the gate. Northern Illinois freezes deep, and a gate post is one of the first things to feel it.
Here is the failure pattern we see over and over from Villa Park out to Wheaton and Naperville:
This is why a gate post on the wet, shaded side of a driveway leans years before one on high, well-drained ground. It is also why simply tightening the hinges does not last here: if the post is leaning from a heaved footing, the gate keeps dropping no matter what you do at the hinge. The footing is the fix. This is the part every generic gate guide skips, and it is the whole reason "just adjust the hinge" fails in this climate.
The right repair depends entirely on which of the four you have. Here is the honest matchup, with what the work involves.
| What you found | The correct fix | What it involves |
|---|---|---|
| Worn hinge pin or elongated hole, frame square, post plumb | Replace with correctly sized weld-on hinges | Cut off the worn hinges, weld on barrel/tube hinges sized to the gate's weight, grease and hang. On a steel gate this beats any bolt-on hinge, which just wallows its holes again. |
| Cracked weld at a hinge or a frame corner | Grind out and re-weld | Grind the cracked weld back to clean metal and lay a new full-strength weld. There is no bracket, screw, or epoxy substitute for a cracked structural weld. |
| Frame racked out of square (unequal diagonals) | Re-square and brace the diagonal | Pull the frame back to square, then weld in a compression diagonal or corner gussets so it stops slumping. Details on brace geometry below. |
| Hinge post leaning, footing has moved (frost heave) | Reset the post below the frost line | Excavate the footing, re-set the post plumb below the frost line (roughly 42 inches here), backfill with draining gravel, let it cure, then re-hang and re-align. A hinge fix on a heaved post just re-sags next winter. |
| Gate hangs level but latch misses (hardware or strike post) | Realign or re-weld the latch/strike | Reset the latch or strike/keeper to the gate's real closed position, or reset the shifted strike post. Quick when the gate itself is sound. |
A note on hinges and weight. Whatever the fix, the hinge has to carry the real weight of the gate, not just hold it up on a calm day. Hinge and pin size should be matched to the gate's weight, width, and how often it swings, and a heavy driveway or estate gate typically wants two or more heavy-duty weld-on hinges rather than a single pair of light ones. Weld-on barrel hinges carry the load through the weld and the pin, not through a few fasteners in wallowed-out holes, which is why they outlast bolt-on hardware on steel gates.
If your gate frame has racked, a diagonal brace is what stops it, and the single most common DIY mistake is running the brace the wrong direction. There are two kinds of brace, and they go in opposite diagonals.
Aim the diagonal as close to 45 degrees as the frame allows. A diagonal near 45 degrees splits the load efficiently between holding the corner up and holding the frame square. On a metal gate the durable version of this is a welded steel diagonal in the compression direction, or welded corner gussets, so the frame cannot rack again. A cable kit is the light-duty, homeowner-installable version and is fine on a sound, lighter gate. It is not a substitute for a weld on a heavy steel gate that has already failed once.
There is a point where re-tightening or replacing a bolt-on hinge stops working, and it is predictable. Every time a screwed or bolted hinge takes the swinging load, it works its fasteners a little. On a steel gate the holes elongate, the bolts loosen, and eventually there is nothing left to snug. You tighten it, it holds for a month, it sags again.
The durable answer on a metal gate is a weld-on hinge. Instead of relying on a few fasteners, the hinge is welded directly to the gate frame and to the post, so the load runs through a continuous weld and the hinge pin rather than through hardware in a wallowed-out hole. Weld-on barrel or tube hinges also let a welder set the exact hinge position and pin height needed to bring the free corner back up, which a fixed-hole bolt-on hinge cannot do. For a heavy or frequently used gate, this is usually not optional, it is the difference between a repair that lasts and one that is back to dragging by spring.
If your diagnosis landed on a leaning hinge post, understand that no amount of hinge work fixes it, because the metal is not what failed. The ground moved.
The correct reset is footing work, not gate work. A welder or contractor excavates the heaved footing, re-sets the post plumb and below the local frost line (roughly 42 inches in northern Illinois), and backfills with draining gravel so water cannot pool, saturate, and freeze against the footing again. A footing that reaches below the frost line and sheds water is what keeps the post vertical through the next winter. Once the post is plumb and cured, the gate gets re-hung and re-aligned, and the latch lines up again. Skip the footing and re-weld a hinge on a heaved post, and you are just buying one season before it sags right back.
There is a clean line between what a careful homeowner can do and what needs a welder, and it is not about pride. It is about steel, welds, and the ground.
You can reasonably DIY: installing a cable-and-turnbuckle anti-sag kit on a light, sound gate hanging on a plumb post, or realigning a loose latch. Get the cable in the tension diagonal (top-hinge to bottom-latch), tighten it, done.
Stop and call a welder when any of these are true:
Short version: a cable kit on a light gate with a good post is a fair weekend job. Steel, a cracked weld, a heaved post, or a heavy driveway gate is a welder.
The old way to fix a badly sagging metal gate was to unbolt or cut it off its posts, haul it to a welding shop, repair it on a bench, and bring it back another day. That means two trips, a stretch of days with your driveway or yard standing open, and often more damage getting a heavy gate off and back on.
Mabutas fixes sagging gates on-site, in a single visit. The truck is the shop. We diagnose it at your driveway, re-weld or replace the hinge, add an anti-sag brace, or reset a post right there, and you have a gate that swings true and latches before we leave, with no hauling anything anywhere. For a driveway or security gate people use every day, single-visit on-site repair is not just more convenient, it means you are never left with an open, unsecured opening.
Because this is on-site work by nature, the whole job happens at your gate. Our mobile gate repair and welding service in DuPage County covers everything in the fix table above. If the same lean or corrosion has reached a connected fence run, that is a related trade: see wrought iron fence repair for DuPage County. If your ironwork is showing the same salt-and-freeze wear elsewhere, our guides on a loose or wobbly exterior iron railing and on wrought iron repair vs replacement walk through the same kind of call.
Almost every sagging gate I get called to, the gate panel is perfectly good steel. It's a worn hinge, a cracked weld, or a post that leaned out on us over the winters. I'll close it, watch which way the gap opens, and show you the spot that actually failed before I touch it. Then I weld on the right hinge or reset the post so the next few winters don't just drop it again. If somebody's quoting you a whole new gate, get a second look first.
Don Mabutas, Mabutas Mobile Welding
A sagging metal gate that won't latch is a diagnosis problem, not a mystery. The dropped corner you see at the latch is coming from one of three places: a worn or cracked hinge, a hinge post that has leaned, or a frame that has racked out of square. Read the latch gap, plumb the post, and check the diagonals, in that order, and you will know which one. In this climate a leaning post usually means frost heave, and that is footing work, not a hinge tweak. A cable kit on a light gate with a plumb post can be a DIY fix. Steel, a cracked weld, a heaved post, or a heavy driveway gate is a weld-and-reset job, and that is a welder, not a bracket.
Text a couple of photos to 312-324-4832, one of the closed gate showing the latch gap and one of the hinge side, or request a quote online. You'll get a straight answer: what actually dropped, whether it's a hinge, a brace, or a post reset, and what it'll cost, with the welder coming to you anywhere in DuPage County.
Get a Fast QuoteSources: NOAA National Weather Service, Chicago office (winter freeze-thaw climate for northern Illinois) · University of Illinois Extension (soil, frost, and ground reference)
A fence post fails in the ground rather than at the hinges, so the repair is a different one from anything on this page. For that failure see an iron fence post that has rusted through at the base.
Gate and hinge-post work is one of the most common calls we take in Glendale Heights.